RunCam Near-IR and AeroChrome
Near IR has been covered in earlier posts and I wanted to expand on the topic after seeing it represented in false color. I happened upon Mathieu Stern’s work a couple of weeks after my last post, which he posted just over three weeks earlier.
The commercial grade work employed a yellow filter inserted in a modified high end camera that had its Near IR filter removed by Kolari Vision. This second video expanded on the topic.
The filter manufacturer also provided a blog post, written by Yann Philippe, regarding near IR digital processing with the use of their filters.
The post mentioned Kodak Aerochrome film and how it represents invisible near IR light in the red color spectrum. It also mentioned how this film has been discontinued and they provide a means to digitally reproduce it with the use of their color filters. The post provided some information about other efforts to digitally create the Aerochrome effect with the use of Yellow #12 filters and extensive postproduction. They noted edge artifacts can be introduced largely from channel mixing. Yann Philippe then approached the idea of using an opposing yellow filter, which brought about the cyan filter Kolar Vision offers, with striking results.
I then searched for efforts by others in replicating the Aerocrhome effect and found this posting by Todd Dominey providing the back story about the film and some history of it. He also demonstrates his use of filters in digital photography.
I then sampled the work of others in mimicking the Aerochrome effect.
Recreating Aerochrome – A Discontinued Infrared Film
Joshua Bird
https://joshuabird.com/blog/post/recreating-aerochrome
How to Emulate the look of Aerochrome Film
Dan Wampler
https://www.lifepixel.com/photo-tutorials/emulate-look-aerochrome-film
One-Image Aerochrome with Green and Orange filter
Christoph
https://www.ultravioletphotography.com/content/index.php?/topic/4292-one-image-aerochrome-with-green-and-orange-filter/
It was worth taking a closer look at Richard Mosse’s work that Todd mentioned earlier. since it used the actual Aerochrome film stock that was becoming scarce.
I then decided to use Carl Bergsdorf’s method to create a false color representation using existing material I already had, mainly since he demonstrated how to do the process using GIMP.
My results in GIMP were plagued with edge artifacts, the resulting images had a halo effect. Since I was considering applying these changes to a large quantity of stock, I needed a scriptable method. Fred Weinhaus offers an ImageMagick scripts that had cleaner results.
http://www.fmwconcepts.com/imagemagick/huemap/
http://www.fmwconcepts.com/imagemagick/replacecolor/
http://www.fmwconcepts.com/imagemagick/greenscreen/
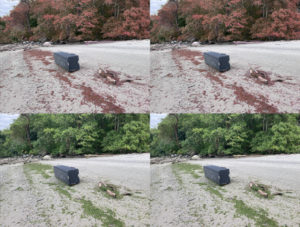
I settled with the huemap and created the following stereoscopic image that turned the green foliage to red.
However, not all of my stock footage gave the same results, with large areas having patching or missing color shifting. The other issue was this was not IR, it was a color shift.
Here is the script I used for the preceding video.
#!/bin/bash
# False Color - Green to Red Shift

srcnme=MINI0038_Full_Stab

wrkdir=/home/user/NOIR/Fred-IM/video5/
srcimg=${wrkdir}images/
prcimg=${wrkdir}processed/
fwimscipt=${wrkdir}huemap

srcmov=${srcnme}.MOV
scalesz=Scale720_
hue=Hue_
imgseq=${srcimg}${scalesz}${srcnme}_%04d.png

ffmpeg -i ${srcmov} -vf "scale=1280:720" ${scalesz}${srcmov}
ffmpeg -i ${scalesz}${srcmov} -vf fps=30 ${imgseq}

cd $srcimg
for file in *.png; do bash $fwimscipt -h 110,35 -t 80,90 ${file} ${prcimg}${file}; done

cd $prcimg
ls *png > imagelist1.txt
sed "s/Scale720/file \'Scale720/" imagelist1.txt > imagelist2.txt
sed "s/png/png\'/" imagelist2.txt > imagelist3.txt
ffmpeg -y -r 30 -f concat -safe 0 -i "imagelist3.txt" -c:v libx264 -vf "fps=30,format=yuv420p" ${wrkdir}${scalesz}${hue}${srcmov}
rm *.txt

ffmpeg -i ${srcmov} -i ${wrkdir}${scalesz}${hue}${srcmov} -filter_complex "[0:v][1:v]vstack=inputs=2:shortest=1[outv]" -map "[outv]" Stacked_${wrkdir}${scalesz}${hue}${srcmov}
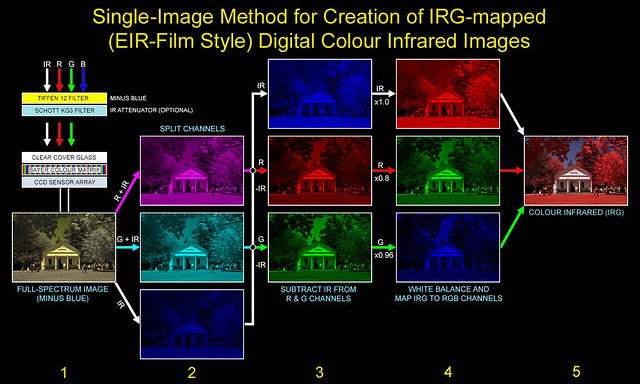
It became clear that my existing footage had limitations which would require me to gather new footage using the filtering method pointed out by Yann Philippe and demonstrated by JW Wong. Unfortunately, I wasn’t able to locate the specifics of the demo, but did locate photos on Flickr.
This photo gave some idea on the postproduction involved. It is a flow chart of how the blue channel is isolated to only containing Near IR by means of a yellow filter. The color channels are then split, shifted, and then the blue channel is canceled from the red and green channels to remove Near IR data. The resulting channels are shifted, then recombined with level adjustments for a false color result.
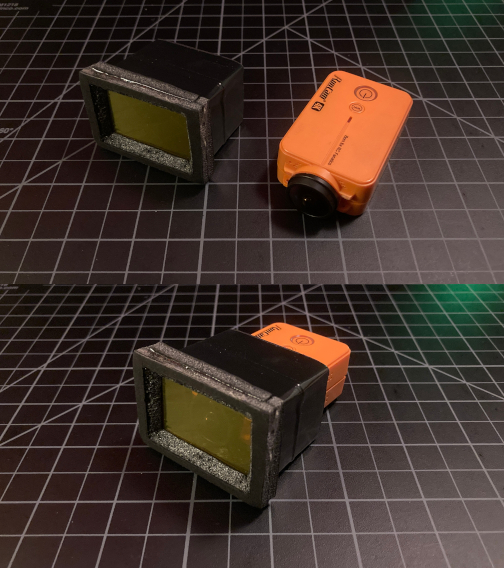
I then created a new filter for my RunCam2 4K camera using foam board and some gel color filters for the closest approximation to cancel blue light.
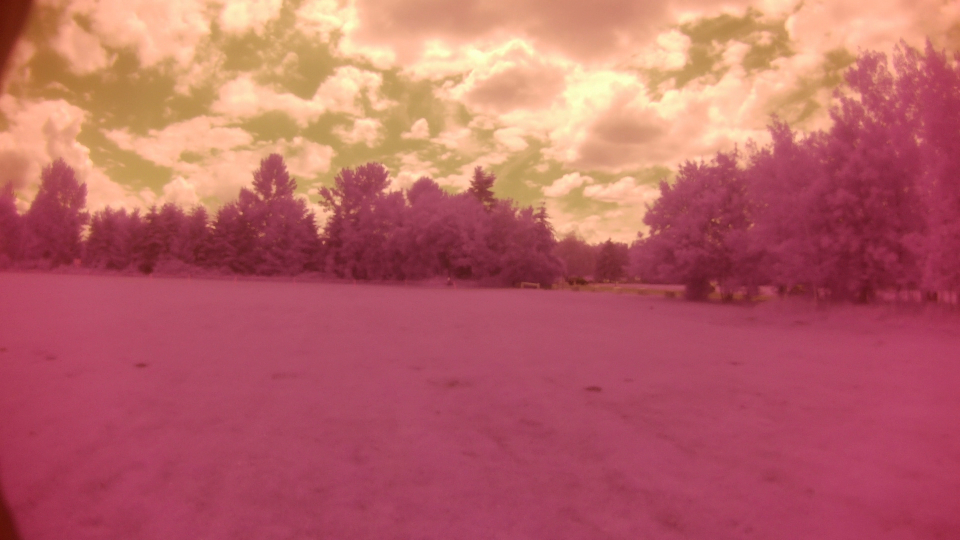
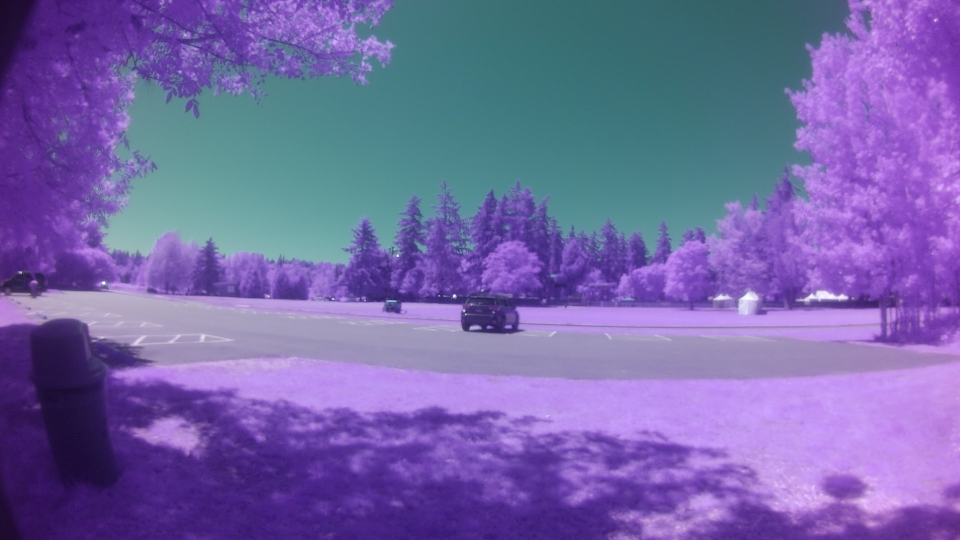
One of the critical requirements in order for this to work properly is that the white balance not be set to automatic. The RunCam doesn’t offer an option to disable the white balance. I assumed that setting it to cloudy when it was cloudy or sunny when it was sunny that the results would be fine. The unprocessed results had a gold and magenta look, which was nothing like the samples that JW Wong had.
It became apparent that the best white balance option for any lighting condition was the incandescent setting. I’m assuming that the warm 2400K color was shifted to 6500K which happens to be what is considered to be daylight or cloudy daytime light, https://en.wikipedia.org/wiki/Color_temperature. I attempted to correct the white balance using similar techniques from the following videos, but the results had degraded too much for them to be useful.
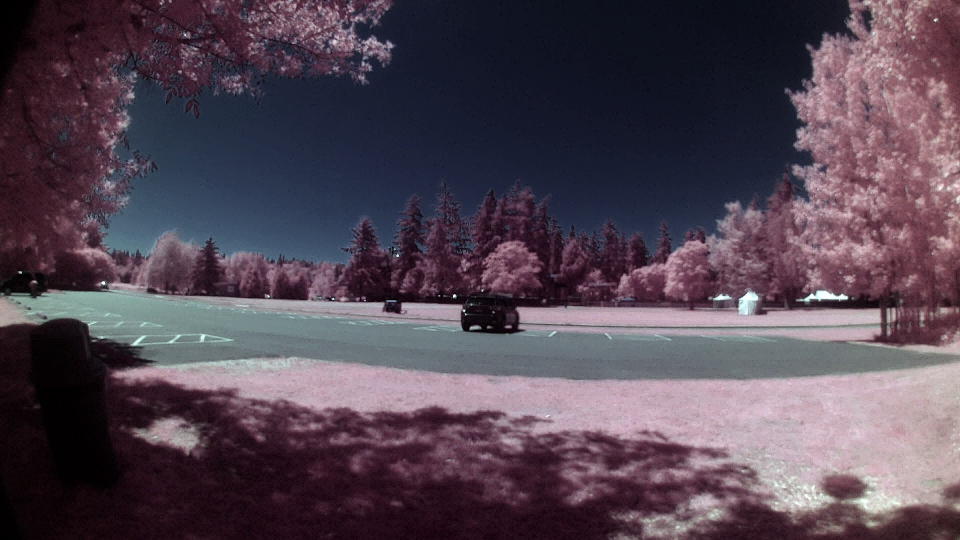
The resulting image was closer, yet no match of JW Wong’s work. So then I went about stacking each process into a script which would hopefully mimic JW’s work and have that AeroChrome look. Here is the script I used for the following image.
#!/bin/bash
# Bulk Process

# Sources
# https://www.imagemagick.org/Usage/compose/
# https://www.imagemagick.org/Usage/color_basics/
# https://www.imagemagick.org/Usage/color_mods/
# http://johnriselvato.com/ffmpeg-how-to-add-color-normalization-to-a-video/
# http://johnriselvato.com/how-to-edit-the-hue-of-a-video/


srcimg=RC_0001_220711130255
imgext=.JPG
vidimg=_FFPEG_Normalize_H-45_S.85
imrimg=_IM-R
imgimg=_IM-G
imbimg=_IM-B
imximg=_IM-X


# This shifts the color so the foliage is closer to a blue grey hue, also normalizes for more depth contrast
ffmpeg -i ${srcimg}${imgext} -vf "normalize=strength=1, hue=h=-45:s=.85" ${srcimg}${vidimg}${imgext}

# This separates the color image into 3 red, green, and blue grayscale images
convert ${srcimg}${vidimg}${imgext} -channel R -separate ${srcimg}${imrimg}${vidimg}${imgext}
convert ${srcimg}${vidimg}${imgext} -channel G -separate ${srcimg}${imgimg}${vidimg}${imgext}
convert ${srcimg}${vidimg}${imgext} -channel B -separate ${srcimg}${imbimg}${vidimg}${imgext}

# This subtracts the blue channel component that contains near IR from the red channel
# The blue channel needs to be recreates as a consequence of the subtraction
convert ${srcimg}${imbimg}${vidimg}${imgext} ${srcimg}${imrimg}${vidimg}${imgext} -compose Mathematics -define compose:args='1,0,0,0' -composite  ${srcimg}${imrimg}X${vidimg}${imgext}
convert ${srcimg}${vidimg}${imgext} -channel B -separate ${srcimg}${imbimg}${vidimg}${imgext}

# This subtracts the blue channel component that contains near IR from the green channel
# The blue channel needs to be recreates as a consequence of the subtraction
convert ${srcimg}${imbimg}${vidimg}${imgext} ${srcimg}${imgimg}${vidimg}${imgext} -compose Mathematics -define compose:args='1,0,0,0' -composite  ${srcimg}${imgimg}X${vidimg}${imgext}
convert ${srcimg}${vidimg}${imgext} -channel B -separate ${srcimg}${imbimg}${vidimg}${imgext}

# Each of the resulting channels need to have levels adjusted for balance and the channels are reassigned before combining them into color
# Blue becomes the red channel, red becomes the green channel, and green becomes the blue channel.
convert ${srcimg}${imbimg}${vidimg}${imgext} -level 0%,100%,0.5 ${srcimg}${imrimg}2${vidimg}${imgext}
convert ${srcimg}${imrimg}X${vidimg}${imgext} -normalize ${srcimg}${imgimg}2${vidimg}${imgext}
convert ${srcimg}${imgimg}X${vidimg}${imgext} -normalize ${srcimg}${imbimg}2${vidimg}${imgext}

# This combines the grayscale color channels into a color image
convert ${srcimg}${imrimg}2${vidimg}${imgext} ${srcimg}${imgimg}2${vidimg}${imgext} ${srcimg}${imbimg}2${vidimg}${imgext} -channel RGB -combine ${srcimg}${imximg}${vidimg}${imgext}

# This sharpens the image due to bluring from the yellow gel filters
convert ${srcimg}${imximg}${vidimg}${imgext} -unsharp 0x4+0.6+0 ${srcimg}${imximg}2${vidimg}${imgext}
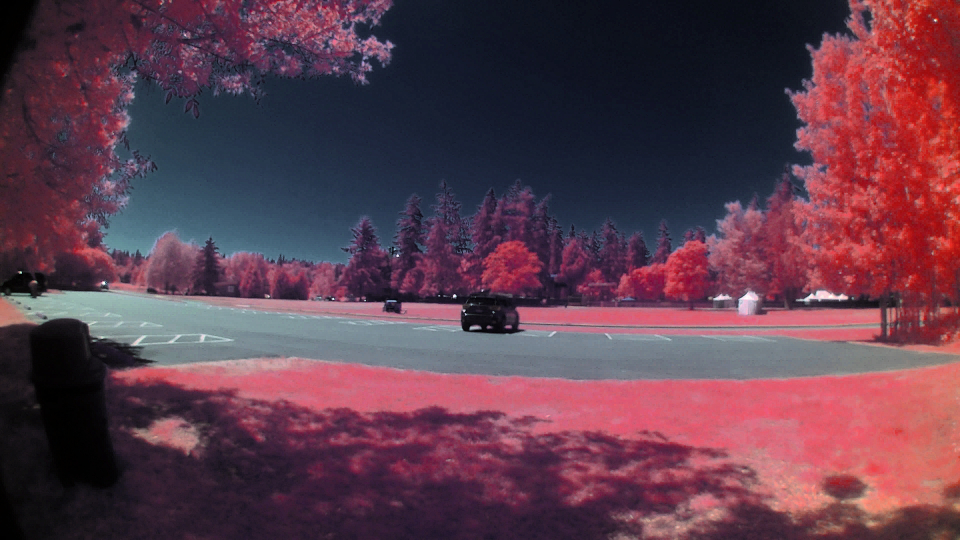
The image had some of the qualities of AeroChrome, but lacked pop and punch in the red channel. The channel cancellation in the script wasn’t doing what I had intended. It was stacking the two greyscale images with the result having a combination of darker shades while allowing lighter shades to pass. My intention was to subtract the lighter shades of either the red or green channels based on the amount of white shades in the blue (Near IR) channel. After some attempts of doing this in GIMP, I settled on isolation, alpha channeling, and layering to get the color depth. Since ImageMagick didn’t offer alpha channeling, I had to employ a script from Fred Weinhaus, http://www.fmwconcepts.com/imagemagick/color2alpha/index.php. Here is the updated script used to do that with the results below.
#!/bin/bash
# Bulk Process

# Sources
# https://www.imagemagick.org/Usage/compose/
# https://www.imagemagick.org/Usage/color_basics/
# https://www.imagemagick.org/Usage/color_mods/
# http://johnriselvato.com/ffmpeg-how-to-add-color-normalization-to-a-video/
# http://johnriselvato.com/how-to-edit-the-hue-of-a-video/
# http://www.fmwconcepts.com/imagemagick/color2alpha/index.php


srcimg=RC_0001_220711130255
imgext=.JPG
lyrext=.PNG
vidimg=_FFPEG_Normalize_H-45_S.85
imrimg=_IM-R
imgimg=_IM-G
imbimg=_IM-B
imximg=_IM-X


# This shifts the color so the foliage is closer to a blue grey hue, also normalizes for more depth contrast
ffmpeg -i ${srcimg}${imgext} -vf "normalize=strength=1, hue=h=-45:s=.85" ${srcimg}${vidimg}${imgext}

# This separates the color image into 3 red, green, and blue grayscale images
convert ${srcimg}${vidimg}${imgext} -channel R -separate ${srcimg}${imrimg}${vidimg}${imgext}
convert ${srcimg}${vidimg}${imgext} -channel G -separate ${srcimg}${imgimg}${vidimg}${imgext}
convert ${srcimg}${vidimg}${imgext} -channel B -separate ${srcimg}${imbimg}${vidimg}${imgext}

# This subtracts the blue channel component that contains near IR from the red channel
# The blue channel needs to be recreates as a consequence of the subtraction
convert ${srcimg}${imbimg}${vidimg}${imgext} ${srcimg}${imrimg}${vidimg}${imgext} -compose minus_src -composite ${srcimg}${imrimg}X${vidimg}${imgext}
convert ${srcimg}${imbimg}${vidimg}${imgext} ${srcimg}${imrimg}${vidimg}${imgext} -compose Mathematics -define compose:args='1,0,0,0' -composite  ${srcimg}${imrimg}X${vidimg}${lyrext}
convert ${srcimg}${vidimg}${imgext} -channel B -separate ${srcimg}${imbimg}${vidimg}${imgext}

# This subtracts the blue channel component that contains near IR from the green channel
# The blue channel needs to be recreates as a consequence of the subtraction
convert ${srcimg}${imbimg}${vidimg}${imgext} ${srcimg}${imgimg}${vidimg}${imgext} -compose minus_src -composite ${srcimg}${imgimg}X${vidimg}${imgext}
convert ${srcimg}${imbimg}${vidimg}${imgext} ${srcimg}${imgimg}${vidimg}${imgext} -compose Mathematics -define compose:args='1,0,0,0' -composite  ${srcimg}${imgimg}X${vidimg}${lyrext}
convert ${srcimg}${vidimg}${imgext} -channel B -separate ${srcimg}${imbimg}${vidimg}${imgext}
convert ${srcimg}${vidimg}${imgext} -channel B -separate ${srcimg}${imbimg}${vidimg}${lyrext}

# Each of the resulting channels need to have levels adjusted for balance and the channels are reassigned before combining them into color
# Blue becomes the red channel, red becomes the green channel, and green becomes the blue channel.
convert ${srcimg}${imbimg}${vidimg}${imgext} -normalize ${srcimg}${imrimg}2${vidimg}${imgext}
convert ${srcimg}${imrimg}X${vidimg}${imgext} -negate -normalize ${srcimg}${imgimg}2${vidimg}${imgext}
convert ${srcimg}${imgimg}X${vidimg}${imgext} -negate -normalize ${srcimg}${imbimg}2${vidimg}${imgext}
convert ${srcimg}${imbimg}${vidimg}${lyrext} -level 0%,100%,0.5 ${srcimg}${imrimg}2${vidimg}${lyrext}
convert ${srcimg}${imrimg}X${vidimg}${lyrext} -normalize ${srcimg}${imgimg}2${vidimg}${lyrext}
convert ${srcimg}${imgimg}X${vidimg}${lyrext} -normalize ${srcimg}${imbimg}2${vidimg}${lyrext}

# This combines the grayscale color channels into a color image
convert ${srcimg}${imrimg}2${vidimg}${imgext} ${srcimg}${imgimg}2${vidimg}${imgext} ${srcimg}${imbimg}2${vidimg}${imgext} -channel RGB -combine ${srcimg}${imximg}${vidimg}${imgext}
convert ${srcimg}${imrimg}2${vidimg}${lyrext} ${srcimg}${imgimg}2${vidimg}${lyrext} ${srcimg}${imbimg}2${vidimg}${lyrext} -channel RGB -combine ${srcimg}${imximg}${vidimg}${lyrext}

# This sharpens the image due to bluring from the yellow gel filters
convert ${srcimg}${imximg}${vidimg}${imgext} -unsharp 0x4+0.6+0 ${srcimg}${imximg}2${vidimg}${imgext}
convert ${srcimg}${imximg}${vidimg}${lyrext} -unsharp 0x4+0.6+0 ${srcimg}${imximg}2${vidimg}${lyrext}

./color2alpha -ca cyan -g 3 ${srcimg}${imximg}2${vidimg}${imgext} ${srcimg}${imximg}3${vidimg}${lyrext}

convert ${srcimg}${imximg}2${vidimg}${lyrext} \( ${srcimg}${imximg}3${vidimg}${lyrext} -alpha set -channel alpha -evaluate multiply 0.8 \) -flatten ${srcimg}${imximg}4${vidimg}${lyrext}
This was a closer approximation so I ran it against JW’s samples. The results were darker blues but less reds. There are so many factors that need to match, I concluded that any combination of these first needed to be matched to get comparable results. I then created a script to process video taken with the RunCam. Here is that script with the resulting video
#!/bin/bash
# Aerochrome Process

srcnme=RC_0002_220711130856

wrkdir=/PathContainingVideo/
srcimg=${wrkdir}images/
prcimg=${wrkdir}processed/

srcmov=${srcnme}.MP4
scalesz=Scale_Flip_FrameRate_ColorShift_
imgseq=${srcimg}${scalesz}${srcnme}_%04d.png
imrimg=_IM-R
imgimg=_IM-G
imbimg=_IM-B
imximg=_IM-X
fwimscipt=${wrkdir}color2alpha


ffmpeg -i ${srcmov} -vf "scale=640:360, hflip, vflip, fps=30, hue=h=-45:s=.85" ${scalesz}${srcmov}
ffmpeg -i ${scalesz}${srcmov} ${imgseq}


cd $srcimg
for file in *.png;
do

# This separates the color image into 3 red, green, and blue grayscale images
convert ${file} -channel R -separate ${prcimg}R_${file}
convert ${file} -channel G -separate ${prcimg}G_${file}
convert ${file} -channel B -separate ${prcimg}B_${file}

# This subtracts the blue channel component that contains near IR from the red channel
# The blue channel needs to be recreates as a consequence of the subtraction
convert ${prcimg}B_${file} ${prcimg}R_${file} -compose minus_src -composite ${prcimg}RY_${file}
convert ${prcimg}B_${file} ${prcimg}R_${file} -compose Mathematics -define compose:args='1,0,0,0' -composite  ${prcimg}RX_${file}
convert ${file} -channel B -separate ${prcimg}B_${file}

# This subtracts the blue channel component that contains near IR from the green channel
# The blue channel needs to be recreates as a consequence of the subtraction
convert ${prcimg}B_${file} ${prcimg}G_${file} -compose minus_src -composite ${prcimg}GY_${file}
convert ${prcimg}B_${file} ${prcimg}G_${file} -compose Mathematics -define compose:args='1,0,0,0' -composite  ${prcimg}GX_${file}
convert ${file} -channel B -separate ${prcimg}B_${file}

# Each of the resulting channels need to have levels adjusted for balance and the channels are reassigned before combining them into color
# Blue becomes the red channel, red becomes the green channel, and green becomes the blue channel.
convert ${prcimg}B_${file} -normalize ${prcimg}RY1_${file}
convert ${prcimg}RY_${file} -negate -normalize ${prcimg}GY1_${file}
convert ${prcimg}GY_${file} -negate -normalize ${prcimg}BY1_${file}
convert ${prcimg}B_${file} -level 0%,100%,0.5 ${prcimg}RX1_${file}
convert ${prcimg}RX_${file} ${prcimg}GX1_${file}
convert ${prcimg}GX_${file} ${prcimg}BX1_${file}

# This combines the grayscale color channels into a color image
convert ${prcimg}RY1_${file} ${prcimg}GY1_${file} ${prcimg}BY1_${file} -channel RGB -combine ${prcimg}IY_${file}
convert ${prcimg}RX1_${file} ${prcimg}GX1_${file} ${prcimg}BX1_${file} -channel RGB -combine ${prcimg}IX_${file}

# This sharpens the image due to bluring from the yellow gel filters
convert ${prcimg}IY_${file} -unsharp 0x4+0.6+0 ${prcimg}IY1_${file}
convert ${prcimg}IX_${file} -unsharp 0x4+0.6+0 ${prcimg}IX1_${file}

bash $fwimscipt -ca cyan -g 3 ${prcimg}IY1_${file} ${prcimg}IY2_${file}

convert ${prcimg}IX_${file} \( ${prcimg}IY2_${file} -alpha set -channel alpha -evaluate multiply 0.8 \) -flatten ${prcimg}IY3_${file}

done


cd $prcimg
ls IY3_*png > imagelist1.txt
sed "s/IY3_/file \'IY3_/" imagelist1.txt > imagelist2.txt
sed "s/png/png\'/" imagelist2.txt > imagelist3.txt
ffmpeg -y -r 30 -f concat -safe 0 -i "imagelist3.txt" -c:v libx264 -vf "fps=30,format=yuv420p" ${wrkdir}IY3_${srcmov}
rm *.txt


# Multi Line Comment
: '

I put stuff here when needed, just to comment it out


'
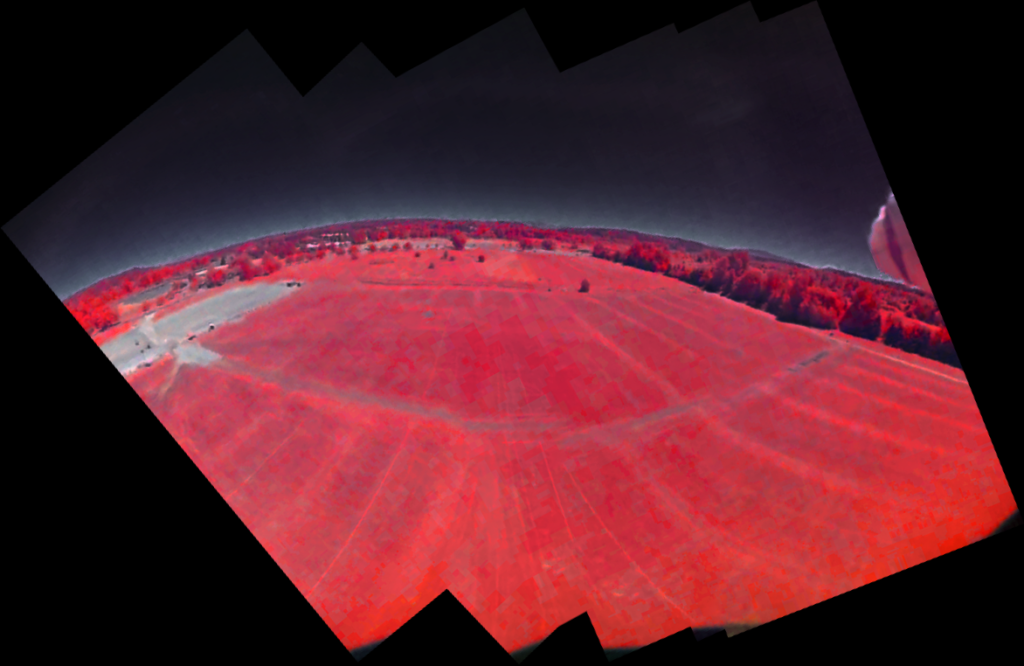
I then took some of the processed images from the video to create some montage views of the area.
From what I could find, near IR imaging predated AeroChrome with it being used aboard ships in bad weather conditions. I could not find much material from Eastman-Kodak regarding AeroChrome, but did find a book written by Walter Clark who was a lead at Eastman Kodak at the time when AeroChrome was created.
Photography by Infrared, Second Edition : Its Principles and Applications Hardcover – January 1, 1947
Walter Clark
https://www.amazon.com/Photography-Infrared-Its-Principles-Applications/dp/1406744867/ref=tmm_pap_swatch_0?_encoding=UTF8&qid=&sr=
Much thanks go out to all mentioned in this post. This was a topic I had not anticipated to revisit so soon. I also want to thank Anthony Thyssen – https://antofthy.gitlab.io/anthony.html, who spelled out the critical process of how to compose channels which I used to get better color depth, https://www.imagemagick.org/Usage/compose/.
