Linear Panoramas with Hugin
We have covered panorama creation using Hugin in previous posts. The method used was taking pictures from a singular point and stitching the images together to create an immersive experience. In this post we will use Hugin to create panoramic scenes, however the images will be sourced from a moving video camera.
There are a few challenges from our source video. First, the camera used has a wide angle lens. The images will be distorted by the lens and we will need to correct this using GIMP. Second, this lens correction comes at a cost. We will then need to crop the images because the edges will still have artifacts from our lens correction. Again, this can be done in GIMP. The next challenge will be the selection of our source images. Using every frame extracted from the video source and processing them would be horribly inefficient. We will want a limited number of source images so Hugin isn’t overburdened, yet enough so it can stitch effectively.
The first step in this process is selecting a video source that meets the requirements of a linear panorama. In my example, I used an action camera that was mounted on the back rack of my mountain bike, with it facing perpendicular to my movement.
Now that the video source has been selected, now it is time to extract the frames into a series of images. To do that we’ll run the following command.
avconv -i /home/local/Desktop/HLP/HLP.mp4 -r 30 -f image2 /home/local/Desktop/HLP/HLP/%05d.png
The number of images will depend on the length of the video file and the number of frames per second. We also want to narrow our image selection so processing is efficient. I settled on 30 images for my Hugin source files.
The action camera has a wide angle lens. This is useful for the raw video footage it can capture, but causes problems if used directly with Hugin. This is why some post processing with GIMP is used to prepare the images for Hugin.
The first thing we’ll change is the lens distortion by removing the fisheye effect. We’ll use GIMP’s lens distort filter to remove the curves. This does a good job of correcting the image, but the outside edges remain distorted.
It is pointless to try and fix this. The stitching will give us what we want anyway. So the next thing that GIMP will be used for is cropping our image. In my images, I found that removing 200 pixels from the left and right side of the image worked well.
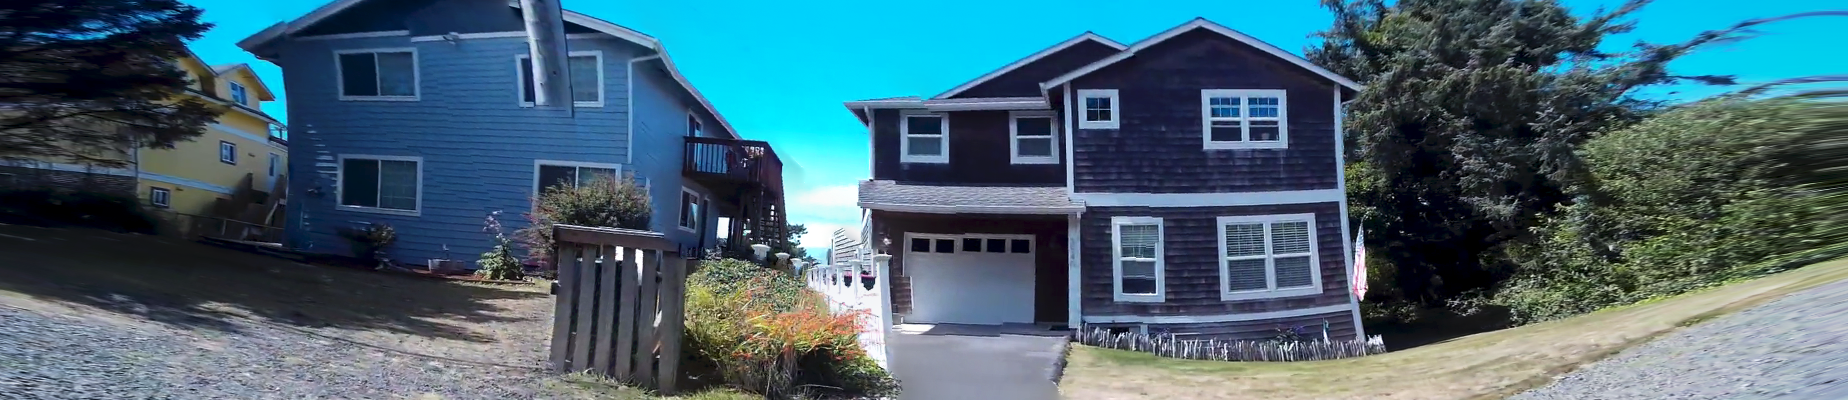
What remains will be the finished image set that we’ll use in Hugin. Hugin should auto detect the control points, but there is a chance that we’ll need to create some manually. Once all the CPs are plotted, we will be ready to stitch our panorama. If all goes well we should end up with a linear panoramic view.
The process is a bit manual intensive, especially GIMP. There are ways to run scripts in GIMP automate the process a bit. Another method to use is the modification of the video source. This can be done with VitualDub and a fisheye filter. The video edit method is appealing because it is much easier to apply both edits, lens distortion and image cropping.
Regardless of the way we use, Hugin will work best with a limited number of source images that provide the most common point overlapping.
Linear panoramic images are a great way to view places that span spaces. It can give the observer a view of the forest instead of the trees.
Further reading
Hugin tutorial — Stitching murals using mosaic mode
Linear Panoramas (Mosaic) Tutorial
Creating linear panoramas with Hugin
Making nodal panoramas that don’t suck